
Ultimate GTMetrix Speed Guide for WordPress (2021)
There are a lot of options when choosing a tool run a website speed test. If you’d like to know the different (and best) methods available today, check out our Ultimate WordPress Speed Guide.
We also did an in-depth look at optimizing your speed using Pingdom, another popular speed test tool. Today, we’re going to look into GTMetrix, whose information many users find confusing. It’s very technical but it’s possible for the average WordPress user to use GTMetrix to improve the speed of any website.
What is GTMetrix?
GTMetrix is a tool that uses a combination of Google PageSpeed Insights and YSlow to generate scores, measurements, and recommendations. It was developed by a Canadian company and is free to use, although they have premium plans available with more options. For the sake of this article, we’ll use the free plan, which is enough for most people to fix the speed problems on their website.
How to Do a GTMetrix Website Speed Test
Most users go straight to GTMetrix.com and type in their website URL to run a test. This is fine but if you create an account, you’ll get access to a lot more features and insights.
Once you create a free account and log in, you’ll see numerous options.
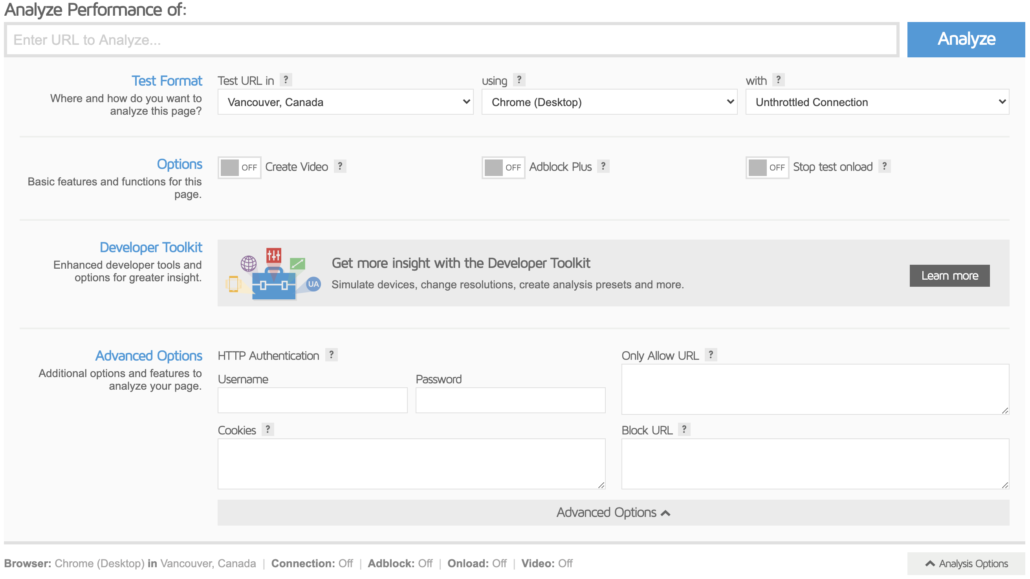
Test Location
When you select a city to test from, that means a server physically located in that city will load your website. The location is very important because you should be careful to select an area that is closest to your audience. It’s very rare for a website to have a truly global audience. For example, São Paulo, Brazil is one of the test locations. Though there are plenty of WordPress websites hosted in São Paulo, Zen WP does not have many customers in Brazil. We’re not a good fit for that market nor do we actively advertise there.
Browser
If you want to run parallel tests with different browsers, this feature will help you identify which files or assets do not load properly on certain browsers and affect load times.
For example, you may serve images in next-gen formats, which speed up loading for new browsers but older browsers such as earlier versions of Internet Explorer might not be able to load them.
Connection Speed
By now you should understand that the speed in which your website loads is really dependent upon the user’s location, browser, and Internet connection. For most websites, it’s not simple a matter of how fast you can get your site to load but rather how fast you can get your site to load for as many people as possible.
The connection speed option only helps you if you want to discover ways to make your website faster for those that also have extremely slow Internet speeds. Your site may load quickly for those with fast Internet connections but slow for those using dial-up. If you believe you have the resources to make your site load fast for dial-up users, this feature will help you identify assets that will make the biggest impact on speed.
Adblock Plus
Turning this on will load your site without the ads. It’s important because most site speeds are bogged down by third-party ads. You can’t do anything about them except to get rid of them.
Stop Test Onload
With similar website speed tools, you’ll normally find 2 different options:
- Onload Time
- Fully Loaded Time
GTMetrix defaults to Fully Loaded Time, which is why the Stop Test Onload option is set to Off.
The Onload Time is the point where the page has been processed and all of the resources have been downloaded by the browser.
Fully Loaded Time is the point beyond the Onload Time where there is no more network activity between the user’s computer and your server for 2 seconds. It’s a much more accurate representation of how fast the page will load for an actual user because once resources are downloaded by your browser, they may download further resources which don’t appear until after the point of the Onload Time. The most common examples of this are image carousels or infinite scrolling features.
PageSpeed
Once you select your options and run the test, you’ll first be presented with the results using the PageSpeed method along with a list of recommendations and grades. We’ll go through each of the most common recommendations.
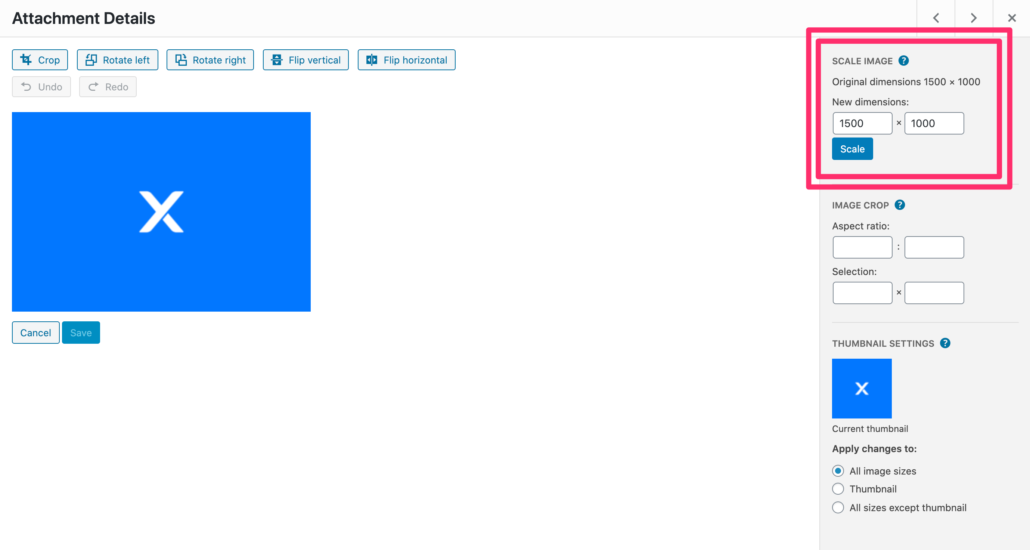
Serve Scaled Images
Make sure the dimensions of your images are scaled down to mach how they actually appear on the page. For example, favicon images should never be bigger than 32×32. There’s no reason the image file should be 64×64.
Fortunately, you can resize images that you’ve already uploaded by using a built-in tool in WordPress’ Media Player.
Leverage Browser Caching
This topic stumps a lot of people when they see these errors on their speed test report, but it’s a very simple problem to understand and even simpler to solve.
Leveraging browser caching by adding expires headers tells the user’s browser to make a copy of certain parts of your website so that the next time the user wants to visit your website, the browser will already have some of the information ready without asking your server for it.
All you have to do to enable this is:
- Access your website’s files through an FTP client like FileZilla.
- Find your .htaccess file and download it.
- Copy and paste the code below at the bottom of your .htaccess file:
# Enable expirations ExpiresActive On # Default directive ExpiresDefault "access plus 1 month" # My favicon ExpiresByType image/x-icon "access plus 1 year" # Images ExpiresByType image/gif "access plus 1 year" ExpiresByType image/png "access plus 1 year" ExpiresByType image/jpg "access plus 1 year" ExpiresByType image/jpeg "access plus 1 year" # CSS ExpiresByType text/css "access plus 1 month" # Javascript ExpiresByType application/javascript "access plus 1 year" - Upload your .htaccess file back to your website. If your old .htaccess file is still there, then overwrite it.
Note: Make sure you enable the setting on your computer that allows you to see hidden files. .htaccess is a hidden file that won’t show up on your computer when you download or create it because it begins with a period. If you’re using a PC, open the folder in which your .htaccess file is saved and under the Options module, configure it to show “Hidden Files and Folders.” If you’re using a Mac, open your Terminal and enter the following command and press Enter:
defaults write com.apple.finder AppleShowAllFiles YESNote: Clicking the dropdown in the test results to see the resources flagged by GTMetrix may also include URLs that you can’t control such as those from:
– Facebook
– Google Tag Manager
– Bing
Defer parsing of JavaScript
When a browser renders a page, code loads from top to bottom and JavaScript is usually placed between the <head></head> tags. This means that until all of your JavaScript loads, your users will see little to no content.
Thus, in order to make content load faster for your users, you have to load the JavaScript last. In order to do so, you can use a plugins or add code to your functions.php file.
Plugin: Async JavaScript
Generally, you’ll have to simply install and activate the plugin in order to reap the benefits. But if you’re technical, you can further use the plugin to add “async” or “defer” attributes.
Functions.php
Open up your functions.php file and add the following code at the very bottom:
function defer_parsing_of_js ( $url ) {
if ( FALSE === strpos( $url, '.js' ) ) return $url;
if ( strpos( $url, 'jquery.js' ) ) return $url;
return "$url' defer ";
}
add_filter( 'clean_url', 'defer_parsing_of_js', 11, 1 );
Inline Small CSS
There are two ways to add CSS to elements on your site:
- Add CSS to a stylesheet that only contains CSS. This file will load in parallel with your page.
- Inline CSS properties to your HTML elements.
Adding inline CSS (Option #2) will make your page load faster, as your user’s browser won’t be forced to load extra files (stylesheets). However, it’s not practical nor efficient when developing your site to inline all of your CSS. Additionally, most themes feature global CSS files that load no matter what with every page.
To combat this, you could use a free CDN such Cloudflare.
Minify JavaScript, Minify CSS, and Minify HTML
These three are different line items in your list of recommendations and scores, but the concept is the same. Minification is the act of removing unnecessary whitespaces, comments, and redundant code from your files.
For example, comments are very useful in development but they do nothing to affect your site. A user’s browser will load comments, which can only slow down processing.
Here’s an example of CSS that is NOT minified:
body {
  background-color: powderblue;
}
h1 {
  color: blue;
}
p {
  color: red;
}
Here’s an example of the same CSS that is minified:
body{background-color:#b0e0e6}h1{color:#00f}p{color:red}To make sure your files are all minified, you can use Autoptimize or your CDN. Be careful if you have minification settings enabled for both – make sure you know what you’re doing.
Optimize the order of styles and scripts
Your page is comprised of HTML, CSS, and JavaScript, and everthing loads in a certain order. When all of your HTML begins loading first and then JavaScript starts to load, these two will load in parallel. But when you have JavaScript loading before HTML, the loading of HTML will be delayed until the JavaScript finishes loading.
Thus, the best option is load JavaScript last. If you already use Autoptimize or a CDN per some of the recommendations above, then this score shouldn’t be too low.
On the other hand, it may be very low if you have a lot of JavaScript that makes calls to third-party resources such as the Facebook pixel, Google Font, icons, etc.
Specify a Cache Validator
Each file should specify an explicit caching policy that answers the following questions: whether the resource can be cached, for how long, and what to do when the caching policy expires. When your server returns a response it must provide the Cache-Control and ETag headers to the user’s browser. If it doesn’t then your files may be called unnecessarily every time the user visits the page.
If you use a CDN, especially a free one such as Cloudflare, all of the resources that are served from your server will contain these headers.
The only resources that may not contain these headers and thus result in the warnings are third-party resources such as the Facebook pixel and Disqus.


