
Password protecting your WordPress directory files (/wp-admin.php and /wp-login.php) can add an extra layer of security to your WordPress website.
Now before we talk about how you can actually do this, let’s quickly go over some pros and cons of this security feature:
Pros
- Extra layer of authentication
- Significantly decreases the number of people who might access your login page
Cons
- Doesn’t stop the attempt itself
- Does not limit the number of attempts at the first layer of authentication
When you password protect your login page, anybody that tries to access your /wp-login.php page will be asked for a username and password before being allowed to enter the username and password for your actual WordPress admin.
So basically, it will require two sets of login information in order to access the WordPress admin.
This will thwart most human attempts at cracking your password since, mathematically speaking, the method greatly multiplies the number of possible login combinations.
It will also deter bots from making attempts at your login since upon visiting the login page for your WordPress website, an error will be returned.
However, it won’t defend against the attempt itself since the bot or the hacker will still reach your website and server.
Another thing to note is that this method does not allow for you to limit the number of login attempts for the first layer of authentication. This means that if a particular person is absolutely determined at guessing the login for your website, they’ll (theoretically) eventually crack the first layer.
However, you can also limit the number of login attempts at your WordPress admin, which will significantly improve your security in addition to this method.
How to Password Protect Your Login Page
1. Log in to your cPanel and find the “Security” section.
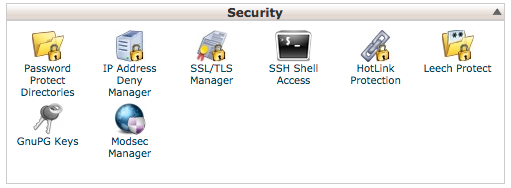
2. Click on “Password Protect Directories” to get a pop up.
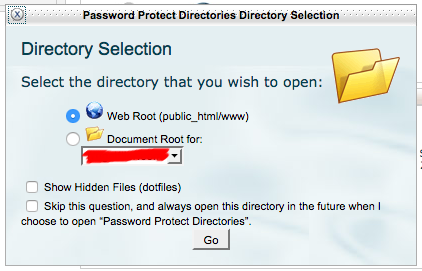
3. Make sure the “Web Root” radio button is selected as shown above and click “Go.”
4. The next page might look different depending on your host and the features available to you but it should look something like this:

Navigate to the folder where your WordPress installation is located and click on wp-admin to be led to a page like this:
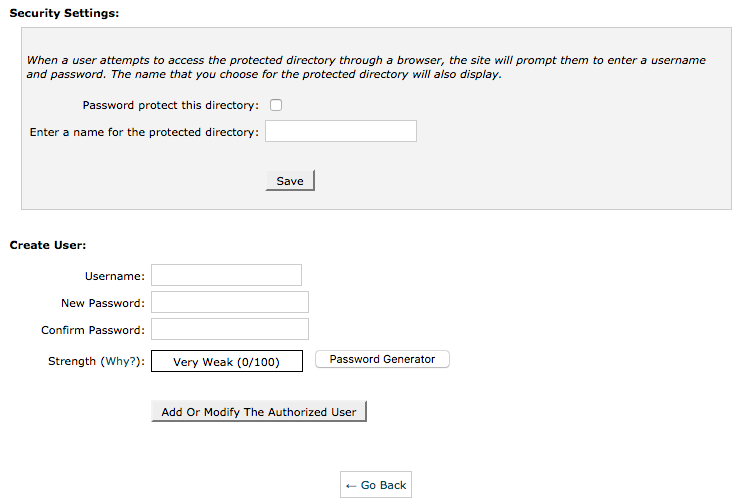
6. In the second box where it says “Create User,” go ahead and create a username and password. This is what you will use to access your WordPress admin login page.
7. Click “Add or Modify The Authorized User.”
8. After you’ve successfully password protected the directory and created a user, navigate to your WordPress login page. You’ll be prompted to enter a username and password before accessing the login page.
How to Reverse the Feature
If in the future, you decide that you no longer want to password protect the directory, you can go back to the page shown in Step 4, uncheck the box for “Password protect this directory,” and click “Save.”
You can also change the username and/or password on the same page.
Want to read more articles like this one? See 25 Ways to Improve WordPress Security