
How to Fix Every Pingdom Page Speed Test Warning
Depending on your site, whether you run a business or you’re a blogger, there can be a lot of different warnings that show up in your Pingdom page speed test report. Below is a list separated by sections to help you correct a majority if not all of the warnings you may see. If we miss anything, and I’m sure we will because Pingdom can very well change some things here and there, let us know in the comments section below and we’ll add it to the article.
Table of Contents
- How to Do A Pingdom Website Speed Test
- Optimize HTML, CSS, JS
- Optimize Images
- Leverage Browser Caching and Add Expires Headers
- Remove Query Strings from Static Resources
- Reduce HTTP Requests
- Specify a Vary: Accept-Encoding Header
- Serve Static Content from a Cookieless Domain
- Avoid Bad Requests
- Minimize Redirects
- Specify a Cache Validator
- About This Pingdom Guide
How to Do A Pingdom Website Speed Test
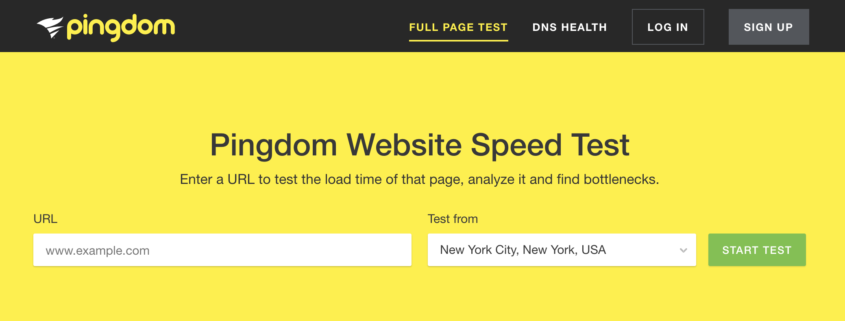
Using Pingdom to test your site speed is simple. First, navigate to the Pingdom Website Speed Test Homepage. You’ll be presented with a simple form:
In the URL section, copy and paste your website including the “http” or “https” part. This is important because if your website redirects all http traffic to https and you copy and paste the http version of your URL, then Pingdom will display some errors about http to https redirect that are probably irrelevant because if you redirect all http traffic to https, there really shouldn’t be any http versions of your URL in the Internet anyway.
In the Test from section, use the dropdown to select the testing location that is closest to the location of your webserver. Others might tell you that the location you select should be where most of your users are located. That’s true, but your webserver should also be where most of your users are located anyway.
Then click the START TEST button.
On the next page, you’ll see two important areas:
- A list of scores and recommendations on how you can address some of the factors that negatively affect your page speed.
- A waterfall chart showing which resource is actually consuming the most load time relative to other assets on the same page.
Depending on your website, you’ll have a variety of error messages or recommendations. Use the list below to address the ones you can.
Optimize HTML, CSS, JS
Optimizing, or minifying, your HTML, CSS, and JS sounds intimidating but it is a pretty easy concept to understand.
Minifying code basically means getting 8 lines of code and make it do the same thing by using one line of code instead. It created less work for the browser and speeds up your website.
Use a plugin like Autoptimize and configure it to minify all of the HTML, CSS, and JS on your WordPress website. Once you download Autoptimize, navigate to the plugin settings where you can check off the option to optimize HTML/ CSS/ JavaScript.
If you are using another plugin that gives you options to optimize or minify your HTML, CSS, and JS like W3 Total Cache, it would be best to rely on only one plugin to optimize the code on your website. In other words, don’t use both plugins to optimize your HTML, CSS, and JS.
Optimize Images
When you use an image on your website, that image will directly contribute to your load time by contributing to your page weight or page size.
But the same image (or what appears to be the same image) could slow down a website by 2 seconds while slowing down a different website by only 0.1 seconds, a huge difference. So where does that difference come from? It comes from these four factors:
- Dimensions of the image
- File type
- Image data
- Image quality (lack of compression)
To reduce the dimensions of the image, you don’t have to use another tool. You can simply upload your image to WordPress, then navigate to the Media Library where you can select your image and click the Edit Image button to open the editing interface. There, you can resize your image to a size that’s appropriate for your site. For example, if you have an image that’s only used as a background image for a section, it should never have to be larger than 1600 pixels in width.
Then, if your file type is not PNG or JPG, use a free tool like Online-Convert to change your image file to a format that’s optimized for the web.
Finally, to address the third and fourth points above, you can either manually optimize images using a free tool online called TinyPNG or use a plugin like Kraken to automate the process for new images moving forward.
Note: Due to the maximum amount of images that can be optimized in a free Kraken.io account, you might have to wait between periods for all of the images on your website to be optimized. Alternatively, you can manually optimize all images currently on your site using TinyPNG and then rely on Kraken to optimize your images going forward.
Leverage Browser Caching and Add Expires Headers
This topic stumps a lot of people when they see these errors on their speed test report, but it’s a very simple problem to understand and even simpler to solve.
Leveraging browser caching by adding expires headers tells the user’s browser to make a copy of certain parts of your website so that the next time the user wants to visit your website, the browser will already have some of the information ready without asking your server for it.
All you have to do to enable this is:
1. Access your website’s files through an FTP client like FileZilla.
2. Find your .htaccess file and download it.
3. Copy and paste the code below at the bottom of your .htaccess file:
4. Upload your .htaccess file back to your website. If your old .htaccess file is still there, then overwrite it.
Note: Make sure you enable the setting on your computer that allows you to see hidden files. .htaccess is a hidden file that won’t show up on your computer when you download or create it because it begins with a period. If you’re using a PC, open the folder in which your .htaccess file is saved and under the Options module, configure it to show “Hidden Files and Folders.” If you’re using a Mac, open your Terminal and enter the following command and press Enter:
Remove Query Strings from Static Resources
Query string resources are URLs with a “&” or “?” and are not cached by most proxy servers, even if you have optimized control headers. Removing them is easy, however. All you have to do is either use a plugin or add the code below to your functions.php file.
Using a Plugin
1. Download this plugin: https://wordpress.org/plugins/remove-query-strings-from-static-resources/
2. Activate it.
3. Done
Adding Code to Your functions.php File
1. Access your website’s files via FTP like FileZilla.
2. Find and open your folder titled wp-content.
3. Find and open your folder titled themes.
4. Download your functions.php file and open it.
5. Add this code to the bottom of the file:
6. Save and upload the functions.php file back to the same place you found it by overwriting the old one if necessary.
Reduce HTTP Requests
This one isn’t as simple as installing a plugin. In fact, it might call for you to get rid of some plugins. If you’re seeing this warning, it’s because your user’s browser is making an unusually large number of requests to your server and third-party locations in order to complete loading the page. This may mean you have too many plugins or images on your page, and the only way to address this is to reduce the number of plugins or images your page loads.
Specify a Vary: Accept-Encoding Header
For your users that are using modern browsers that support gzip compression, if your server sends an uncompressed version of a file and sends it to the modern browser by mistake, the browser will take longer than it otherwise would have to process the file, therefore affecting performance. Thus, by using the Vary: Accept-Encoding header, your server will always deliver the correct version of all of your files. Keep in mind that this will only work for files that are on your server. If a file from a third-party location is being delivered, from a plugin for example, then you have no control over this.
If you’re using Apache, add the following code to the bottom your .htaccess file:
If you’re using NGINX, add the following code to the bottom your /etc/nginx/nginx.conf file:
Serve Static Content from a Cookieless Domain
This is a warning that’s uncommon and can be ignored in most cases. The reason why you’re receiving the error is because cookies are accompanying static assets such as images when your page loads. Pingdom finds this unnecessary and believes that if you get rid of the cookies for the assets in question, then by definition, when a page loads, your server will have to send “less” through the pipe thus making your webpage load faster.
However, now that pretty much every modern browser supports HTTP/2, the negative effects that these cookies have on load time are negligible. But if you insist on addressing the issue, you can make sure that all of /wp-content files are served from a subdomain (Notice how nearly all of your files that are flagged by Pingdom are from your /wp-content directory), and then configure WordPress to serve cookies only from you primary domain. Here is how you can do this:
1. Create a subdomain such as nocookie.domain.com or static.domain.com where you replace “domain” with your actual website’s domain.
2. CNAME your /wp-content directory with your subdomain. For example, you would set your Host to static.domain.com and set your Value to domain.com/wp-content/
3. Add the following to your wp-config.php file:
Avoid Bad Requests
If you have a third-party link on your webpage or an image that you deleted, you may see the “Avoid bad requests” warning, which means that somewhere on your page, a link that results in a 404 error is being requested. Obviously, if a link doesn’t exist anymore, then there’s no sense calling on it so in this case, you would find every such link and simply delete it from your page.
It’s very uncommon to see this happening with a link that a plugin or your theme might be requesting. If so, then the plugin or theme is probably no longer in active development.
Minimize Redirects
99% of the time, you will see this warning if by navigating to a URL, it performs more than 1 redirect before the content displays. This is acceptable if the traffic to the page has to go through a tracking link or if you have a www/https redirect so the warning should be ignored. For example, if you type in your web browser:
https://zenwp.co/
then it will redirect you to the https version because we force https on all pages on our site:
https://zenwp.co/
So if you type in https://zenwp.co/ as the page to test in Pingdom, it will redirect Pingdom to https://zenwp.co/, which will flag it as an unnecessary redirect, when in fact it is since the only way to address it would be to allow http pages to load.
But if you test the https version instead (https://zenwp.co/), then the site won’t redirect Pingdom so the warning won’t display.
The same can be said when you try to test https://www.zenwp.co/. Since Zen WP forces the non-www version and forces https, two redirects will happen:
First from http://www.zenwp.co/ to https://www.zenwp.co/.
Then from https://www.zenwp.co/ to https://zenwp.co/.
Minimize Request Size
If you are seeing this warning or if you have less than a perfect score of 100, then your page is too bulky. You might have too many plugins trying to load on the page or way too many heavy images. See some of the sections above to correct these issues. You can pinpoint which assets are most responsible for the warnings by looking at your waterfall chart at the bottom of the Pingdom analysis.
Specify a Cache Validator
Every resource on your site should contain a caching header especially those that can be cached because it provides browsers with information on what the latest version of your file is. If this information isn’t present, the browser won’t know when to refresh their cache, thus forcing it to fetch the file from your server every time, which contributes directly to your website’s load.
If you’re using Apache, add this to the bottom of your .htaccess file:
If you’re using NGINX, add this to your config file which can be found in /etc/nginx/nginx.conf.
About This Pingdom Guide
The solutions proposed, outlined, or suggested in this article will apply to most basic WordPress installations that use Pingdom to test their site speed. Sometimes, the solution won’t be as simple as copying and pasting what we provide above into your .htaccess file and you’ll most likely need the help of a developer to get your website to be blazing fast. If you need help, either reach out to our team in the comment section below or sign up for Zen WP’s award-winning WordPress support plans and never worry about another WordPress problem again.


